|
This page will give you step by step instructions on how use The Sims 2 Body Shop. Step 1: Go to your Programs, then EA Games, then The Sims 2, then click on The Sims 2 Body Shop. When the main screen opens click on CREATE PARTS. (as shown in Image 1) Then click on START NEW PROJECT. Continue on to Step 2.
|
Step 2: Next you select the category that you want to edit. I want to create some new pants so I am going to click on CREATE CLOTHING. After you select the category select an age, gender, and fit for the clothes that you want to edit. Then go through the categories of clothing and find the exact item that you want to edit and click on it. Then click on EXPORT SELCETED TEXTURES. (as shown in Image 2) It will then ask you to name your project. I am going to call mine "tutorial", but you can name your’s whatever you like. Then click on OK and it will export the textures so that you can edit them. Note: The fit option does not always appear and only appears when you select an item of clothing. Continue on to Step 3.
|
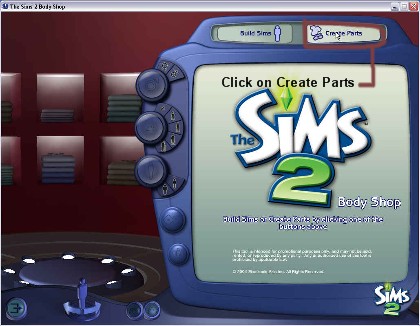 Image 1
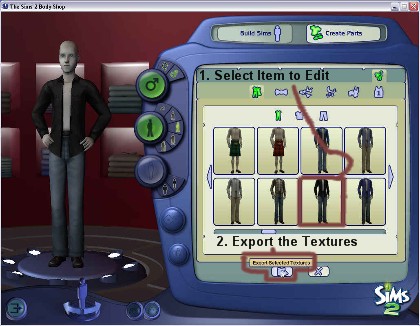 Image 2
 Image 3
 Image 4
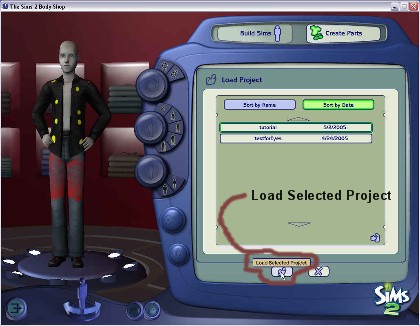 Image 5
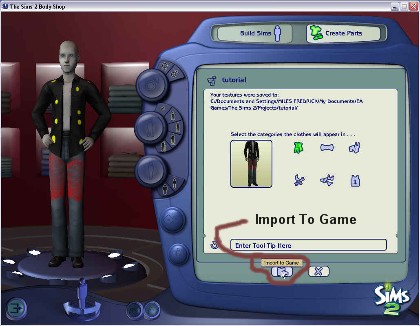 Image 6
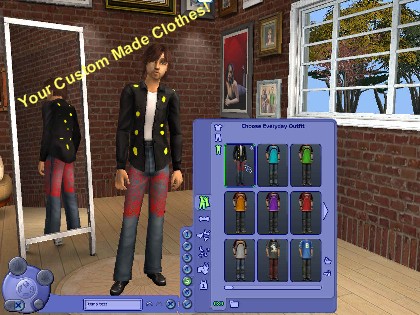 Image 7
