
|
|
This page will give you step by step instructions on how to get and use The Sims 2 HomeCrafter Plus. Step 1: The first thing you want to do is get the right software. Go to this web site http://thesims2.ea.com/getcoolstuff/homecrafter.php and download The Sims 2 HomeCrafter Plus from the official site. Continue to Step 2
|
|
|
|
Step 2: Once you have finished downloading the software as stated above, install the software. Continue to Step 3.
|
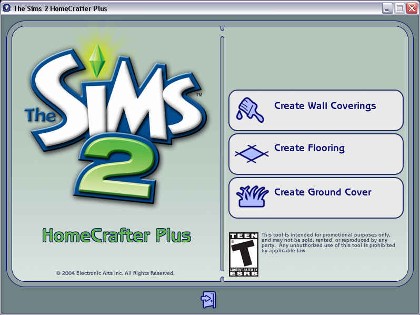 Image 1
|
|
Step 3: Once you have successfully installed the software go to your Programs, then EA Games, then The Sims 2 HomeCrafter Plus, then click on The Sims 2 HomeCrafter Plus. When the main screen opens (as shown in image 1) click on the object type that you want to create. *Create Wall Coverings, Create Flooring, or Create Ground Cover* Continue on to Step 4.
|
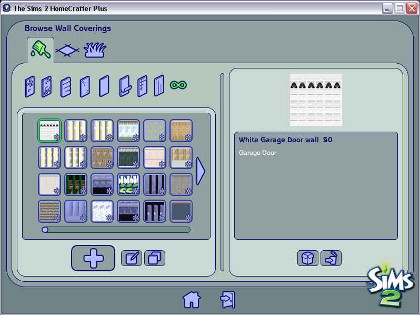 Image 2
|
|
Step 4: Let’s use Create Wall Coverings as an example. When you click on it, it will display wall coverings that you can choose from. (as shown in image 2) Take a look through them and find a wall covering that you would like to edit. Continue on to Step 5.
|
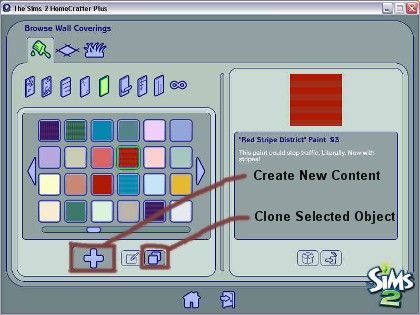 Image 3
|
|
Step 5: Once you find the one you want to edit click on it and then click on the Clone Selected Content Button. (Note: if you want to make your custom content from scratch rather them edit content that you already have click Create New Content instead.) (both buttons are shown in image 3) Continue on to Step 6.
|
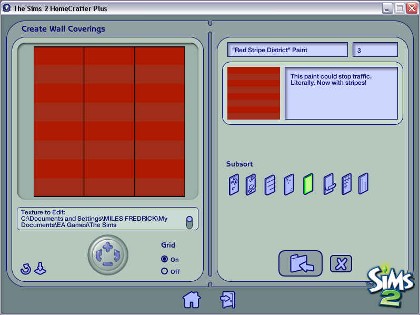 Image 4
|
|
Step 6: I am going to edit content I already have. I picked out "Red Stripe District" in the paint section, therefore; I clicked the "Clone Selected Content" button. Now it will display a screen that looks like the one in image 4. (Note: Do not close HomeCrafter when you go to open your graphics editor.) Continue on to Step 7.
|
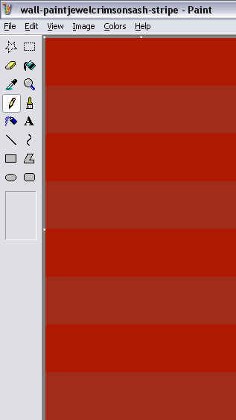 Image 5
|
|
Step 7: Go and open the program that you want to edit it in and open the image file. I am going to use MS paint, (as shown in image 5), but you could use some other graphics editor like a picture editor. The file will be located in C:Documents and Settings * your user or account name * My Documents * EA Games * The Sims 2 * Projects * HomeCrafter Plus * Working Directory - if you are editing content you already have and C:Documents and Settings * your user or account name * My Documents * EA Games * The Sims 2 * Projects * HomeCrafter Plus * the type of object you are editing - if you are making your own from scratch. Continue on to Step 8.
|
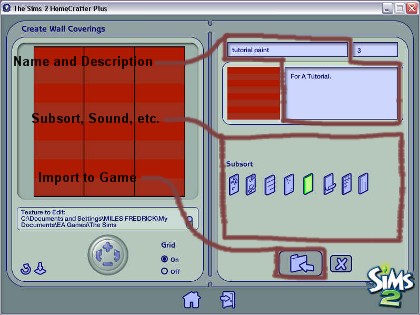 Image 6
|
|
Step 8: Now edit it anyway you like. Get really creative! Maybe even put a picture on it of some flowers you took, etc. It is good idea to do a few practice runs of HomeCrafter just to get a feel for it before you really start getting serious. Make sure you save your work and then close the editing program! Continue on to Step 9.
Step 9: Now go back to your HomeCrafter window and type in a new name and description for your custom content. (1) Then select a subsort, sound, etc. for your custom content. (2) (Note: There is no sound for walls.) Then click on IMPORT TO GAME. (3) It will ask you if you are sure you want to add it to your game. Say YES and it will import it into your game. Continue on to Step 10.
Step 10: All you have to do now is run your game and go to the subsort that you put your designed object in and there it is! (Note: HomeCrafter can not be open or running when you’re playing your game.) It’s as easy as that! If you have any more questions you can e-mail me at webmaster@sims2.itgo.com or at my secondary one postmaster@sims2.itgo.com
|